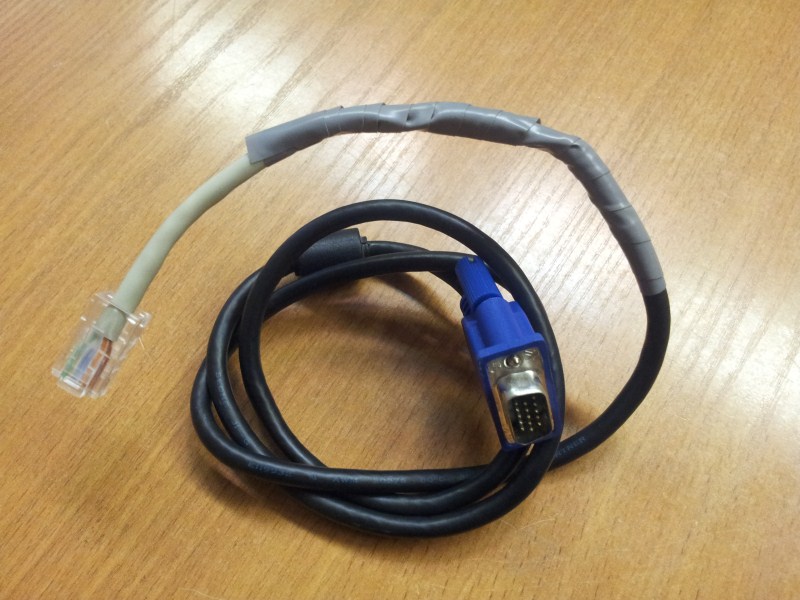
Here at work we get to do all kinds of original things sometimes to solve a problem. This is an interesting thing we did for one of them.
Situation is that we have a few classes to prepare for lectures and that involves hanging projectors from the ceiling. Now of course for that you need a long cable, to connect the computer to a projector on the ceiling.
Buying one is a no go, since they are of limited length and probably wouldn’t be as long as we need them to be. So there are two options of making it. One being to buy VGA ends, take ethernet cable as much as we need and solder the ends to that cable. Sure that works and it looks better, but what if you need to move the computer somewhere and the cable becomes too short? you have to resolder everything and just basically make a new cable. Soldering it would be a pain anyway…
So that leaves us with the option that was best for such a situation, and I’m going to write about it here.
Our solution was to make a detachable VGA cable. Here are the steps to make it (no pics, sorry I didn’t take any during the process):
- Put CAT5 plugs on the ethernet cable like you would normally making a network, make sure both ends match with colors. I did colors like this: Green-White/Green/Orange-White/Blue/Blue-White/Orange/Brown-White/Brown.
- Cut off about 10-15 cm ends from that cable and cut your VGA cable in half.
- Prepare the Ethernet cable like you normally would.
- To prepare the VGA cable, it’s best to use the same network pliers to get that shield off. It should cut off the rubber and that metal shield too cleanly without damaging other wires below it. You cannot put CAT5 ends directly onto a VGA cable, and that’s because some wires are too big to fit in or too small to be tightened. Therefore you’ll have to solder them together and this is why I told you to cut off ethernet ends. So start heating your soldering iron now :)
- Now comes the tricky part – to correctly connect these wires. Lucky for us, the colors in a VGA cable and in the ethernet cable usually match, more or less. But first the VGA pinout:

- Here is how you match those wires:
- VGA Pin 1 (Red) → CAT5 Orange
- VGA Pin 6 (Red negative) → CAT5 Orange/White
- VGA Pin 2 (Green) → CAT5 Green
- VGA Pin 7 (Green negative) → CAT5 Green/White
- VGA Pin 3 (Blue) → CAT5 Blue
- VGA Pin 8 (Blue negative) → CAT5 Blue/White
- VGA Pin 13 (Transparent) → CAT5 Brown
- VGA Pin 14 (White) → CAT5 Brown/White
When you connect the wires, use a multimeter to “call” and see if you connected the wires correctly. What is left can be cut off, remaining wires will not be needed.
- If everything is connected correctly, try it out. Wrap each contact separately so that they don’t touch. Such cable does not support high resolutions however, so you will not be able to use it for your monitor, but it works great for a projector.
- To connect both ends you will need a regular cat5 couplers. They look like this:
But you need to take care when using those because they flip connections from one side to another. When using 2 of these it’s all good because the signal gets flipped on one end, and flipped back at the other end.
The final thing looks like this:

And now you can just use practically any regular Ethernet cable to extend the VGA – instant PoE (Picture over Ethernet) :D I haven’t also tried but it most likely possible to use a splitter this way, to send the signal to 2 or more projectors at the same time hehe :)


